 how-to
Preventative Maintenance for Industrial Control Panels
Table of Contents
- Why Preventative Maintenance for Industrial Control Panels Pays Off
- Safety First: Isolation and Electrical Safety Requirements
- Your Industrial Control Panel Maintenance Checklist
- Building a Preventive Maintenance Schedule for Electrical Panels
- Control Panel Maintenance Procedures, Step by Step
- Using an Electrical Maintenance Log Template to Track Findings
- Common Mistakes That Undermine Control Panel Maintenance
- Conclusion
- Frequently Asked Questions
Last Updated: October 18, 2026
Why Preventative Maintenance for Industrial Control Panels Pays Off
Preventative maintenance for industrial control panels is the scheduled inspection, cleaning, testing and servicing of the enclosure and its components before faults develop, replacing reactive breakdown repairs with planned work.
A dusty contactor or loose terminal connection does not announce itself, it heats up until a line stops, and you pay for emergency labour, lost production and possibly damaged product.
The real cost of unplanned downtime
A production interruption is never just the repair bill, it is idle staff, missed orders, wasted raw material and the scramble to catch up. Food and beverage plants feel this hardest: a wash-down line that stops mid-cycle can lose a whole batch. Reactive repairs also cost more per job, often replacing a whole component when a clean and a tighten would have done.
How a maintenance strategy extends service life
Components age predictably: contacts pit, fans slow, filters clog, terminals loosen under thermal cycling. A maintenance strategy catches each at the cheap end, clean contacts last longer, and a clear filter keeps airflow up, keeping the panel cooler and slowing degradation of every component inside it. The result is fewer failures and a panel that stays reliable well past the point where an ignored one would have been rebuilt.
Safety First: Isolation and Electrical Safety Requirements
No one opens an industrial control panel while it is live unless there is a documented, justified reason and a qualified person controlling the task. Under Australian work health and safety law, the business must manage electrical risks: a documented isolation procedure, lock-out and tag-out, and proof the panel is de-energised before work starts.
Our non-negotiables:
- Isolate and lock out all supply sources, including control and any separate 24V or UPS feeds.
- Test for dead at the terminals you will touch, with a proven tester.
- Tag the isolation point with who locked it and when.
Safe Work Australia publishes guidance on managing electrical risks in the workplace through Safe Work Australia's electrical safety guidance. Read it before you write your own procedure.
Your Industrial Control Panel Maintenance Checklist
A good industrial control panel maintenance checklist is short enough to actually get used. It covers the enclosure, wiring, connections and airflow path; everything else is a deeper inspection done less often. Here is a core checklist to work from:
- Enclosure door seals intact, no gaps, no water ingress
- Enclosure free of dust, swarf and moisture
- No signs of overheating, scorching or discoloured insulation
Enclosure, wiring and terminal checks
With the door open and the panel isolated, look before you touch. Check the enclosure for water marks, rust and dust build-up, a seal failure lets moisture in and faults appear months later. Then check wiring for chafed insulation, missing ferrules and wires pulling out of duct, and terminals for discolouration, which signals heat. A loose connection under load is one of the most common causes of electrical issues in panels.
Ventilation, fans, filters and cleaning
Airflow is the part everyone forgets until something overheats. Clean or replace filters on schedule, a clogged filter starves the panel of cool air, and replace slowing or noisy fans before they stop. Vacuum dust from the interior rather than pushing it deeper with a rag, and keep external louvers clear, especially in dusty agricultural or food processing environments.
Building a Preventive Maintenance Schedule for Electrical Panels
A preventive maintenance schedule for electrical panels should be driven by three things: how critical the panel is, how harsh its environment is, and how hard its components work. A clean, climate-controlled switch room and a dusty flour mill do not need the same frequency. The most common failure is one interval for every panel on site, which over-maintains clean panels and under-maintains the ones that actually fail.
Start with a criticality and environment rating
Before you set any dates, rate each panel on two axes.
Criticality, what happens if this panel stops?
- A, Line stopper. No bypass, no spare capacity, production stops immediately.
- B, Constrained. Production continues at reduced rate or with manual workarounds.
- C, Non-critical. Redundant, or the process can wait for a planned repair.
Environment, what is the panel exposed to?
- Clean and controlled. Sealed switch room, filtered air, stable temperature.
- General industrial. Dust, vibration, normal seasonal temperature swings.
- Harsh. Wash-down, high humidity, fine conductive dust, corrosive atmosphere, or sustained heat above the panel's design ambient.
A-rated panels in harsh environments get the shortest intervals. C-rated panels in clean rooms can run annual cycles. Everything else sits between.
Frequency matrix by component and environment
The table below is a starting framework, not a fixed rule. Adjust it using your own failure history after 12 months.
| Component or task | Clean and controlled | General industrial | Harsh (dust, humidity, wash-down, heat) |
|---|---|---|---|
| Enclosure seals and door gaskets | 12 months | 6 months | 3 months |
| Internal cleaning (vacuum, not blow-out) | 12 months | 6 months | 3 months |
| Filters and filter mats | 12 months | 3-6 months | Monthly or on differential pressure |
| Cooling fans and fan guards | 12 months | 6 months | 3 months |
| Ventilation louvers and external airflow path | 12 months | 6 months | 3 months |
| Terminal torque verification | 24 months | 12 months | 6 months |
| Insulation resistance testing | 24 months | 12 months | 6-12 months |
| Thermographic survey under load | 24 months | 12 months | 6 months |
| Contactor and relay contact inspection | 24 months | 12 months | 6 months |
| Breaker and protective device function check | 24 months | 12 months | 12 months |
| PLC and I/O diagnostics review | 12 months | 6 months | 6 months |
| Drive cooling path and filter check | 12 months | 6 months | 3 months |
| Safety circuit and interlock verification | 12 months | 12 months | 6 months |
| Battery and UPS backup check | 12 months | 12 months | 6 months |
| Earth and bonding continuity check | 24 months | 12 months | 12 months |
Two adjustments matter more than any single row. Duty cycle: a contactor that switches every few minutes wears far faster than one that switches daily, so halve the inspection interval for high-switching components. The same applies to drives running near full load continuously. Ambient temperature: every 10°C of sustained temperature rise above design ambient roughly halves the life of many electronic components.
Set intervals from failure history, not guesswork
After a year, review the schedule against the maintenance log. Panels that generated corrective work between visits are candidates for a shorter interval or a design fix; panels that consistently pass can go longer. The goal is the shortest interval that catches degradation before it becomes a fault, applied only where needed.
Put the schedule in the calendar, not in someone's head, and assign an owner to each panel. If a task slips it should show as overdue, not disappear, an invisible schedule gets skipped the first time production gets busy.
Control Panel Maintenance Procedures, Step by Step
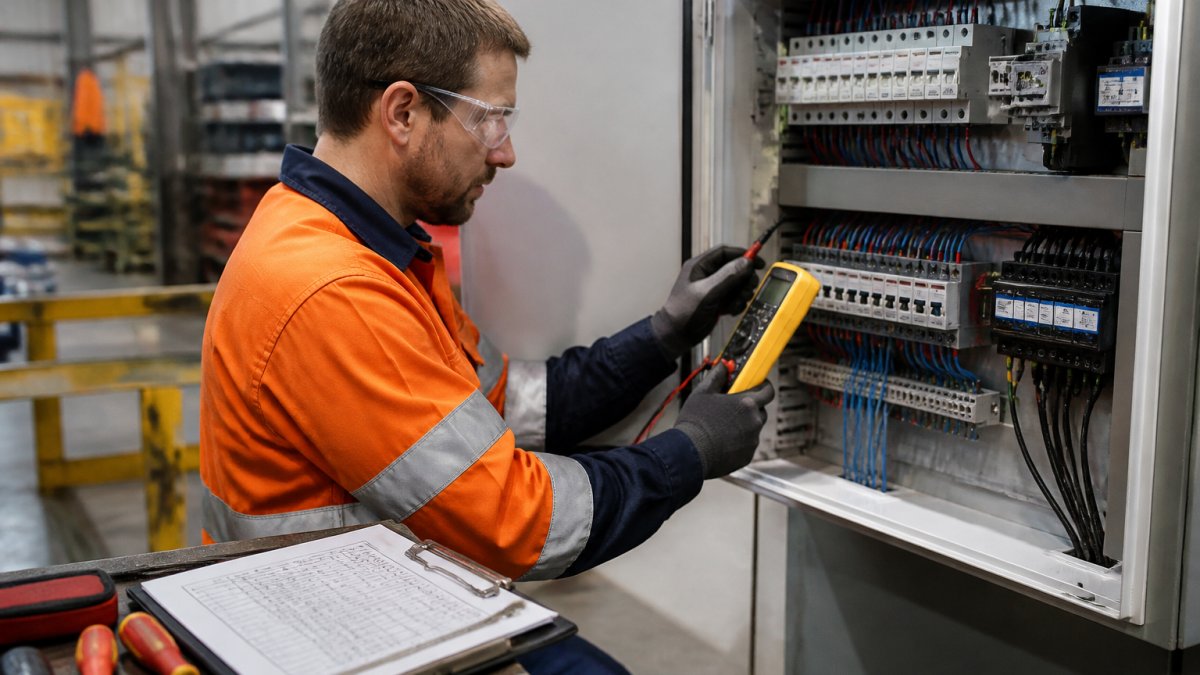
Here is how control panel maintenance procedures can be run on site, in order, isolation and testing before any physical work, verification before the panel goes back into service.
- Plan the visit. Confirm the schedule, the isolation plan, the panel drawings, and who is authorised. Check whether the panel has a UPS, a separate control supply, or a back-feed from another source.
- Isolate and lock out. Follow the documented procedure, lock every source, and test for dead at the point of work with a proven tester.
- Inspect the enclosure. Seals, ingress, corrosion, physical damage, and evidence of overheating.
- Clean the panel. Vacuum dust and debris; clear filters and louvers. Do not blow dust deeper into the enclosure.
- Check airflow. Confirm fans run, filters are clear, and the internal temperature is within the design range.
- Inspect wiring and terminals. Look for heat, chafe, missing ferrules, and loose connections.
- Take measurements. Record insulation resistance and thermographic readings where used, against written acceptance criteria.
- Replace worn components. Fans, filters, contactors, indicator lamps, and any component that failed a measurement.
- Record findings. Log every observation, measurement, and action taken.
- Verify and return to service. Re-energise, confirm operation, and sign off.
Component-level procedures
A generic checklist gets you started, but each component family has its own failure modes and checks. The table below outlines a typical scope of work.
| Component | What to check | Typical failure mode |
|---|---|---|
| PLC and I/O modules | Status LEDs, fault log, I/O forcing, battery condition, firmware version | I/O failure, corrupted memory, dead backup battery |
| Variable speed drives | Cooling fan, heatsink dust, DC bus capacitor condition, fault history, parameter backup | Over-temperature trips, capacitor degradation, lost parameters |
| Power supplies | Output voltage under load, ripple, temperature, terminal tightness | Voltage sag, ripple-induced faults, thermal shutdown |
| Contactors and relays | Contact pitting, coil condition, mechanical wear, terminal torque | Welded contacts, coil failure, intermittent operation |
| Circuit breakers | Trip history, terminal torque, mechanical operation, discrimination | Nuisance tripping, failure to trip, hot terminals |
| Safety circuits and interlocks | Function test of every interlock, wiring integrity, tamper evidence | Defeated interlocks, wiring faults, undetected bypass |
| Enclosure cooling | Fan operation, filter condition, louver clearance, internal temperature | Overheating, dust ingress, fan failure |
| Batteries and UPS | Backup runtime, battery age, charger output, alarm history | Reduced runtime, failed cells, charger fault |
Work through the table panel by panel: skip components that are not present, and add any present component missing from the schedule.
Measurement-based checks and acceptance criteria
Visual inspection catches a lot, but measurements catch what eyes miss.
Insulation resistance. Test at the agreed voltage, record every visit and compare against the previous one.
Thermographic inspection under load. Survey under normal load, record temperature differences between similar phases and components, and compare visit to visit.
Torque verification. Use a calibrated torque tool, record the value and mark the terminal.
Write acceptance criteria into your procedure before the first visit.
Escalation and stop-work rules
Not every finding should be fixed on the spot. Some should stop the job.
- Stop work and escalate on evidence of arcing, scorching, melted insulation or a burning smell. The panel stays isolated until the cause is found.
- Stop work and escalate if a safety interlock fails its function test; the circuit is not returned to service until the interlock is proven.
- Escalate for corrective work if a measurement is outside its acceptance criterion but the panel is otherwise sound. Log it, assign an owner and set a due date.
Post-maintenance verification and return to service
Never walk away from a panel you have worked on without proving it works. Remove locks and tags in the correct order, re-energise, confirm indicator lamps and HMI displays are normal, check fans run and no breakers trip, and confirm the process runs as expected before sign-off. Then update the record, a visit without documentation is a visit you cannot prove happened.
Using an Electrical Maintenance Log Template to Track Findings
An electrical maintenance log template turns a series of visits into a trend you can act on, the difference between "we maintain the panel" and "here is what we found and what we did." Keep these fields in every entry:
- Date, technician and panel ID
- Isolation and lock-out reference
- Visual inspection findings
Log the same fields every time so the data compares, a rising panel temperature or falling insulation reading across visits tells you more than any single inspection. If you use a CMMS, tie each panel to a scheduled task and attach the log, so overdue work surfaces automatically and you have a full history when a fault occurs.
Common Mistakes That Undermine Control Panel Maintenance
The biggest mistake is treating maintenance as a cleaning job. Wiping the outside and calling it done leaves the actual failure points untouched.
Other repeat offenders:
- Skipping the schedule when production is busy. The busiest periods are exactly when you cannot afford a failure.
- No isolation discipline. Rushed work on live panels is how people get hurt.
- Replacing parts without finding the cause. A contactor that keeps failing is telling you something.
Conclusion
The challenge is not knowing that control panels need maintenance. It is building a schedule, a checklist and a record that survive a busy production calendar.
That is where Industry Power Solutions comes in. Industry Power Solutions provides industrial automation and electrical maintenance built around documented procedures, measurement-based checks and clear records.
Get started with Industry Power Solutions and turn reactive breakdowns into planned, predictable maintenance.
Frequently Asked Questions
How often should industrial control panels be inspected?
Most plants run a full scheduled inspection every six to twelve months, with a quick visual inspection monthly. Dusty, hot or high-vibration environments such as food processing and agricultural sites often need quarterly checks. The right inspection frequency depends on the operating environment, how critical the panel is to production uptime, and the manufacturer's recommendations. Review inspection findings each cycle and shorten the interval if you see recurring dust build-up, loose connections or overheating.
What should be included in a control panel maintenance checklist?
A solid industrial control panel maintenance checklist covers the electrical enclosure and door seals, dust and debris removal, ventilation louvers, cooling fans and filters, wiring connections and terminal tightness, indicator lamps, contactor and relay condition, and a thermal check for overheating. It should also record measured values against acceptance criteria, not just pass or fail ticks. Add a section for corrective maintenance actions raised and a sign-off by the qualified person who completed the work.
Can industrial control panels be cleaned while energised?
No. Cleaning inside an electrical control panel should only happen after isolation and lock-out, with the supply proven dead and any stored energy discharged. Dusting or vacuuming a live panel risks arc flash, electric shock and damage to critical components. Use a vacuum rated for electrical work rather than compressed air, which drives dust and debris into contacts and ventilation paths. Only a qualified person should open and clean the enclosure.
What are the signs that an industrial control panel needs maintenance?
Watch for nuisance tripping, flickering indicator lamps, a warm or discoloured enclosure, fans running loudly or not at all, dust build-up on filters, and intermittent faults that clear on their own. Loose connections and worn components often show up as voltage drop or heat before they fail outright. Any of these signs should trigger an early fault detection inspection and a review of your preventive maintenance schedule for electrical panels.